You need welding rods used for gas or TIG. Stick welding electrodes are flux covered.
I made a torch mistake a week or so ago. I forgot to close the tank valves and lost over 2/3rds of a cylinder of O2. Now I have no oxygen.
| Slant Six Forum https://mail.slantsix.org/forum/ |
|
| My brother's "new" 74 Duster https://mail.slantsix.org/forum/viewtopic.php?t=33926 |
Page 3 of 12 |
| Author: | Reed [ Mon Apr 20, 2009 9:13 am ] |
| Post subject: | |
I got some .023 wleding wire. I was also thinking obout the coathanger trick for filling the gap. Instead of a coathanger, what about some arc welding sticks? Can I set one of those in the gap and use it as filler? |
|
| Author: | Joshie225 [ Mon Apr 20, 2009 10:06 am ] |
| Post subject: | |
You need welding rods used for gas or TIG. Stick welding electrodes are flux covered. I made a torch mistake a week or so ago. I forgot to close the tank valves and lost over 2/3rds of a cylinder of O2. Now I have no oxygen. |
|
| Author: | Reed [ Mon Apr 20, 2009 10:25 am ] |
| Post subject: | |
OK. All I have is a stick welder (arc welder) for the heavy stuff and a wire feed without gas for everything else. I have been using .030 flux-cored wire, but the new wire I got is solid .023. Will that be okay without a TIG or MIG setup? |
|
| Author: | Joshie225 [ Mon Apr 20, 2009 11:27 am ] |
| Post subject: | |
You don't have gas for the wire feed? If not you absolutely must use flux core wire. Want to buy my extra 'baby' gas bottle? |
|
| Author: | Reed [ Mon Apr 20, 2009 11:32 am ] |
| Post subject: | |
Well, I need all the hoses and fittings too. My wire feed welder CAN has gas, I just couldn't afford the extra attachments at the time. |
|
| Author: | Joshie225 [ Mon Apr 20, 2009 12:45 pm ] |
| Post subject: | |
Well, if you buy the gas kit I have an empty bottle for you. Brand new, never filled. |
|
| Author: | Reed [ Mon Apr 20, 2009 12:59 pm ] |
| Post subject: | |
Thanks Josh! However, I don't weld often enough to really justify buying a gas setup. But we'll see how this goes. |
|
| Author: | emsvitil [ Mon Apr 20, 2009 1:34 pm ] |
| Post subject: | |
Quote: However, I don't weld often enough to really justify buying a gas setup.
I really don't either, but gas MIG welds are SO MUCH nicer.........(and don't forget to change the polarity when going from flux-wire to gas...........) |
|
| Author: | emsvitil [ Mon Apr 20, 2009 1:36 pm ] |
| Post subject: | |
If the MIG can do both flux and gas, it probably came with a hose already. All I needed on mine was a CO2 bottle and gas regulator........... |
|
| Author: | Reed [ Sun Apr 26, 2009 11:07 pm ] |
| Post subject: | Day four-lots got done |
Mostly finished welding in the passenger rear patch panel today. I am getting better at welding and the welds are coming out smaller and cleaner. I was even able to bridge those huge gaps without making too much of a hash of it. Some grinding and one more clean up session with the welder and I think it will be time for Bondo. The metal didn't warp too bad, but it definitely will need to be made perfect with Bondo. My brother has decided he wants Demon taillights, so he scored a pair of taillights on eBay and he is saving up to buy a repro Demon tail panel. More welding, but it shouldn't be too bad. Ordered a set of air powered shear to trim out the rust on the passenger side rear 1/4. I got a patch panel for it, so that shouldn't take too long to fix. The biggest achievement was stripping off the entire front clip. No more 74 Duster nose. I picked up an entire front clip off of a 67 Dart GT last week to put on the Duster. Just for giggles we hung the fenders from the Dart. Looks pretty cool. So when we get done it will be a 74 Duster body with 71-72 Demon taillights and a 67 Dart front end. My brother is working with a guy he knows in Seattle to repair and reaint the sun damaged plastic interior trim pieces. The pieces are being repaired with fiberglass where necessary and are being repainted black with subtle grey highlights. It will all look very nice when done. My brother brought down a kick panel and the trim from the top of a door panel. Both look great. Since the tranny is already out, next session will probably be pulling the engine and doing some work on the rear driver's 1/4. After that the tedium or sanding and doing Bondo and some POR-15 repair work starts.  Fortunately, the body on the car is very solid. It just needs lots of cleaning and then a good sanding. It is moving along faster than I thought it would, but we are about to hit a big slowdown due to lack of funds. I figure we will spend lots of time sanding and saving money for front end rebuild parts, tires for the 15 inch rims, paint and other bodywork supplies, reaf leaf springs, and a bigger rear axle. |
|
| Author: | Reed [ Fri Jul 24, 2009 8:37 am ] |
| Post subject: | |
Hi everybody! It's been awhile, but I have been very busy with work. I stil have been able to advance progress on my brother's Duster though. Here are some pics. Got the trunk sandblasted/sanded and coated with POR-15: 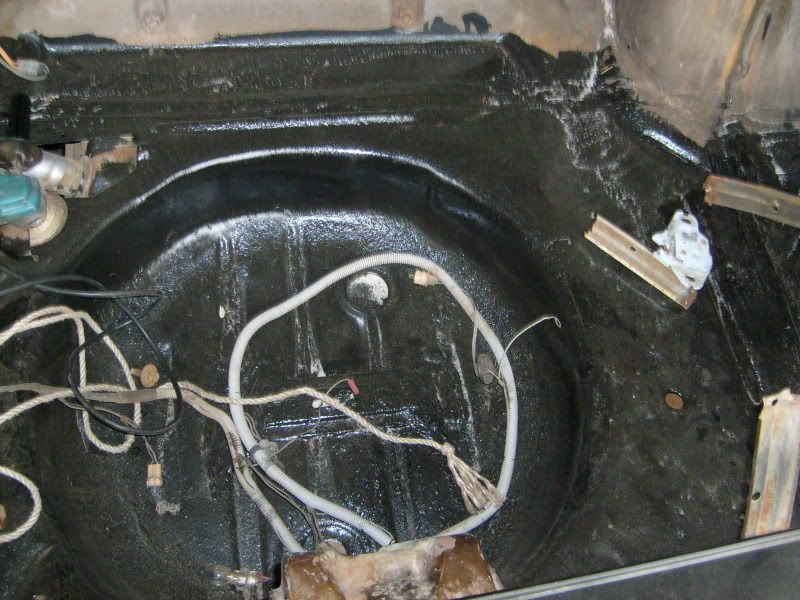 Got a replacement Demon tailpanel off of eBay and got it welded on in place of the stock Duster tail panel: 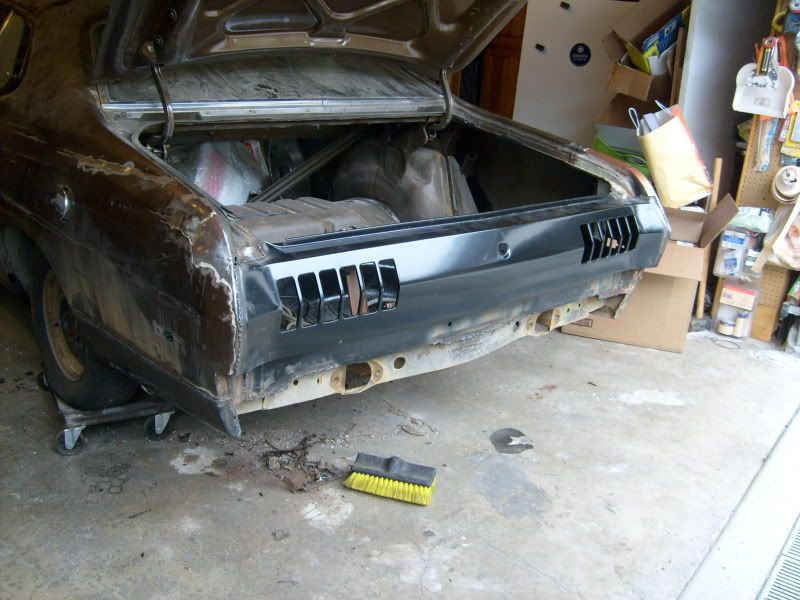 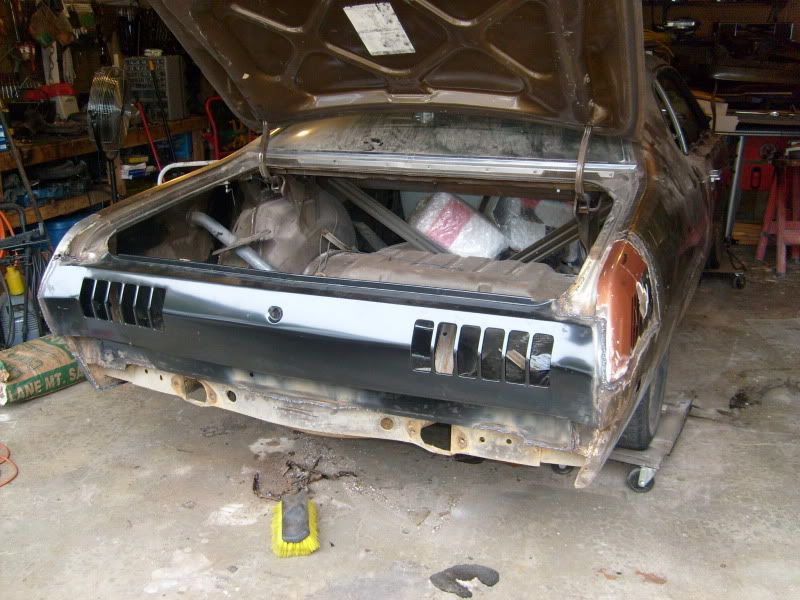 Got the driver's rear 1/4 patch panel cut down and mostly welded on. I still need to weld the bottom of the fender to the drop down section from the trunk floor, but otherwise it is done:  So I have about another 1/2 hour of welding, then it is time to start grinding the welds down, touching up the welds, grind again, and start applying the Bondo. Whew. It is coming along nicely though, and I anticipate getting all the bodywork done in a few moths, including painting the car black, possibly with red pinstriping. One the bodywork it=s done, things should pick up. I can do all the mechanical stuff in my sleep, so the only limitation on that portion will be getting money. I already have an 8 1/4 rear axle with 11 inch drums ( |
|
| Author: | dusterguy225 [ Fri Jul 24, 2009 11:14 am ] |
| Post subject: | |
Quote: Got a replacement Demon tailpanel off of eBay and got it welded on in place of the stock Duster tail panel
Hey! You stole my idea! |
|
| Author: | Reed [ Fri Jul 24, 2009 1:56 pm ] |
| Post subject: | |
Nope. It fit right in. All I had to do was drill the factory spot welds out on the old tail panel and this one fit right in place. There is a slight difference in the shape at the upper corners in the trunk area, but there is plenty of metal for welding it in. The bottom of the panel does have a different profile to accommodate the crash bumper shocks on the later models, but not enough to worry about. I will get it to seal up with some welding and seam putty. The only bad part is the tail panel doesn't have the braces for the Demon tail lights, so I need to fabricate those. Otherwise, it fit right in. |
|
| Author: | Reed [ Wed Sep 30, 2009 11:45 pm ] |
| Post subject: | |
Got the original 7 1/4 small bolt pattern axle out and swapped in the 8 1/4. I was able to re-use the 7 1/4 shock plates by drilling out new holes for the u-bolts. Got the massive 15x10 rear rims mounted, but one of them has an obviously different offset than the other. Will need smaller tires at least, probably will need stiffer and higher arched rear springs. 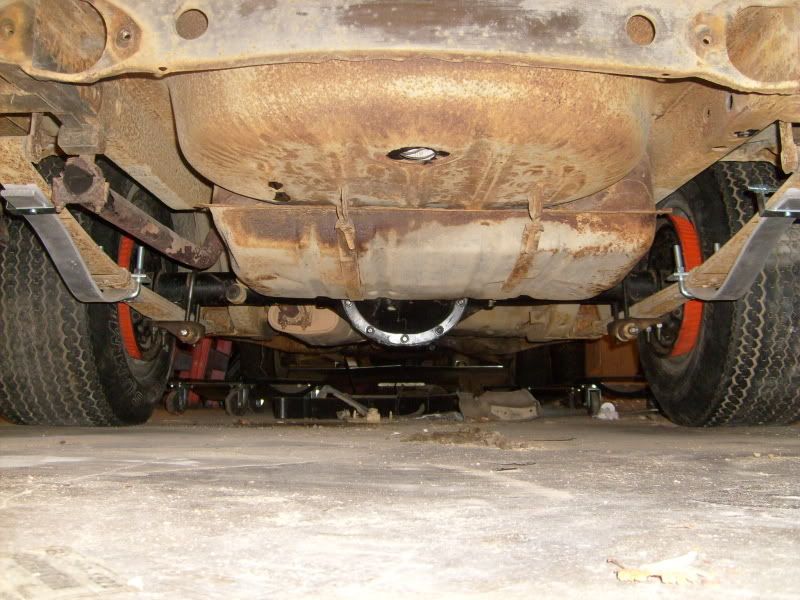 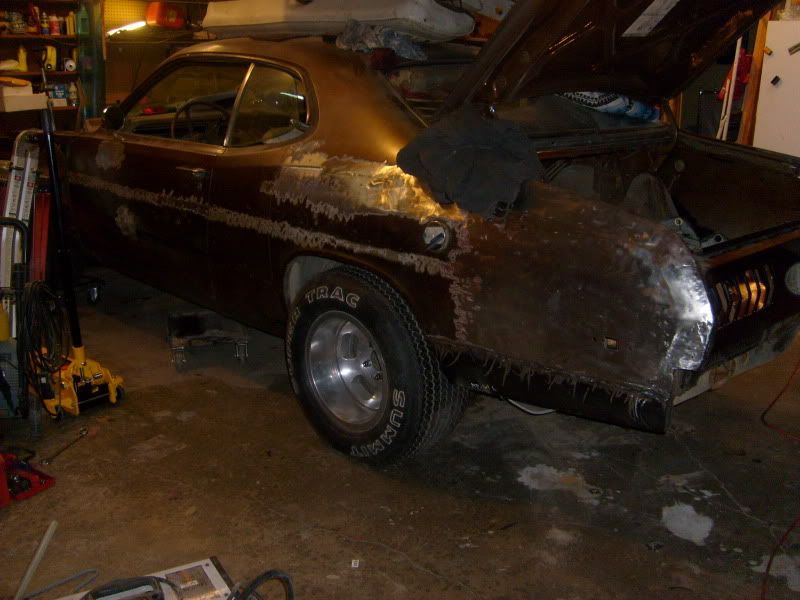 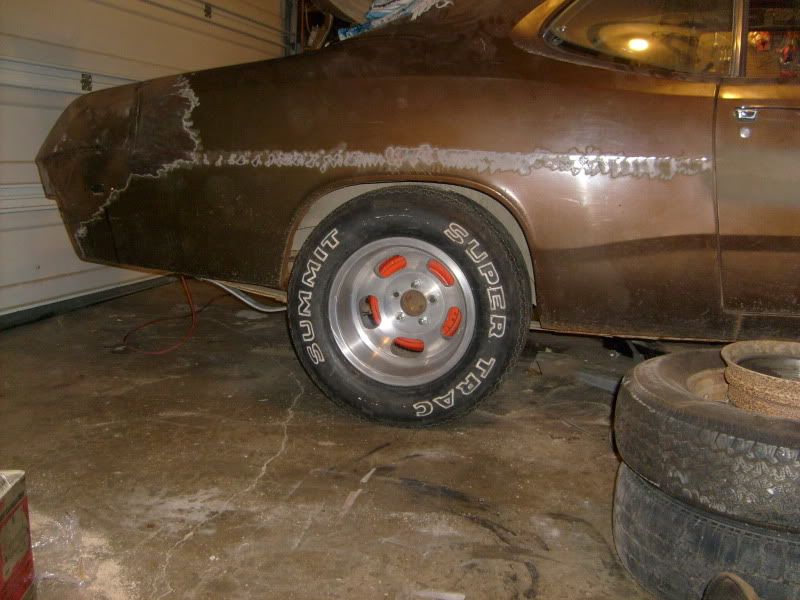 Minor setback with the Demon tail panel. Both sides of the rear end of this car have been hammered in accidents and then pounded back out. The passenger side is worse and required a patch piece to be welded in. Somewhere along the way, the contour of the body got tweaked enough so that the demon tail panel has to flex at a sharper angle. This makes the taillight on the passenger side not fit correctly on the outboard edge. The body is too hammered to make it worthwhile to remove the tail panel and fix the problem, so I will be coming up with a solution to keep the water out of the trunk. Maybe a ridge of body filler and some extra weatherstripping will do the trick. |
|
| Author: | Reed [ Mon Oct 12, 2009 8:43 am ] |
| Post subject: | |
Started applying body filler (Allmetal is good stuff) and replaced the tweaked 74 Duster trunk lid with a straight 70 Duster trunk lid. I like the 70 better, no ridge down the middle of the trunk lid. 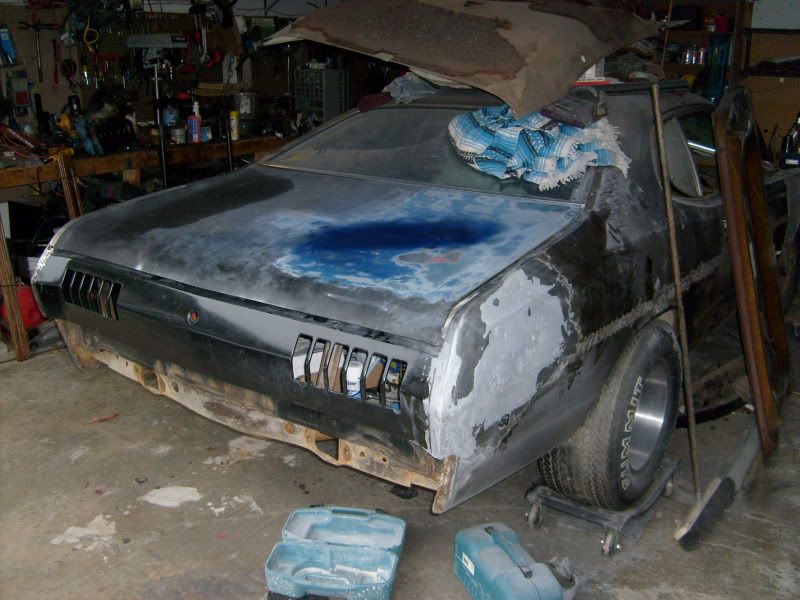 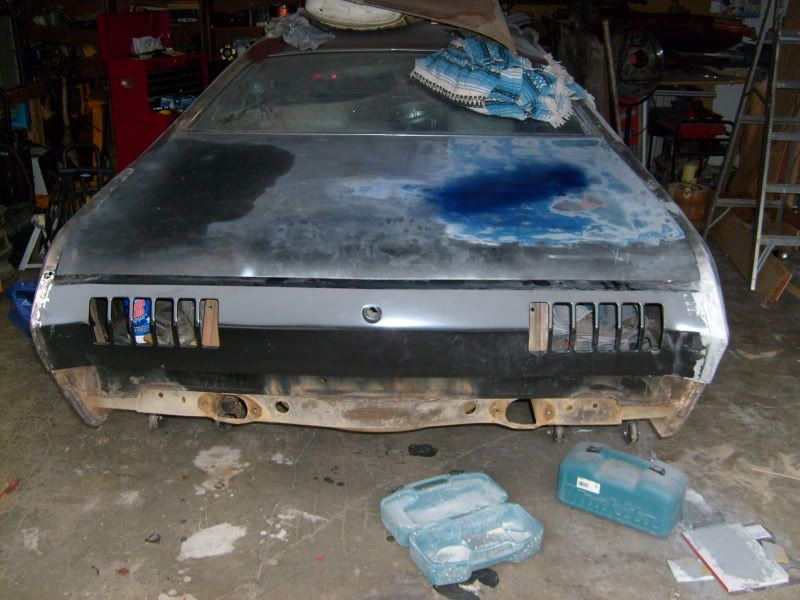 I think I can, I think I can..... |
|
| Page 3 of 12 | All times are UTC-08:00 |
| Powered by phpBB® Forum Software © phpBB Limited https://www.phpbb.com/ |
|